Promise VTrak monitoring
In case of usage of Virtual Appliance- Use local account lpar2rrd for hosting of STOR2RRD on the virtual appliance
- Use /home/stor2rrd/stor2rrd as the product home
Install Prerequisites (skip that in case of Virtual Appliance)
- AIX
# rpm -Uvh net-snmp net-snmp-utils net-snmp-perl
- Linux
Note you might need to allow optional repositories on RHEL to yum can find it# umask 0022 # yum install net-snmp # yum install net-snmp-utils # yum install net-snmp-perl
Use rhel-7-for-power-le-optional-rpms for Linux on Power etc ...# subscription-manager repos --list ... # subscription-manager repos --enable rhel-7-server-optional-rpms
- Linux Debian/Ubuntu
Assure that this line is commented out in /etc/snmp/snmp.conf% umask 0022 % apt-get install snmp libsnmp-perl snmp-mibs-downloader
#mibs :
If apt-get does not find snmp-mibs-downloader package then enable contrib and non-free repositories.
Allow network access
-
Allow access from the STOR2RRD host to the Promise VTrak storage on port 161 UDP .
Test if port is open:$ perl /home/stor2rrd/stor2rrd/bin/conntest_udp.pl 192.168.1.1 161 Connection to "192.168.1.1" on port "161" is ok
Storage SNMP configuration : Enable SNMP
- Login to the Promise WebPAM as a user account that has with Privilege level rights set as “Super”.
- Select the “Administration” tab
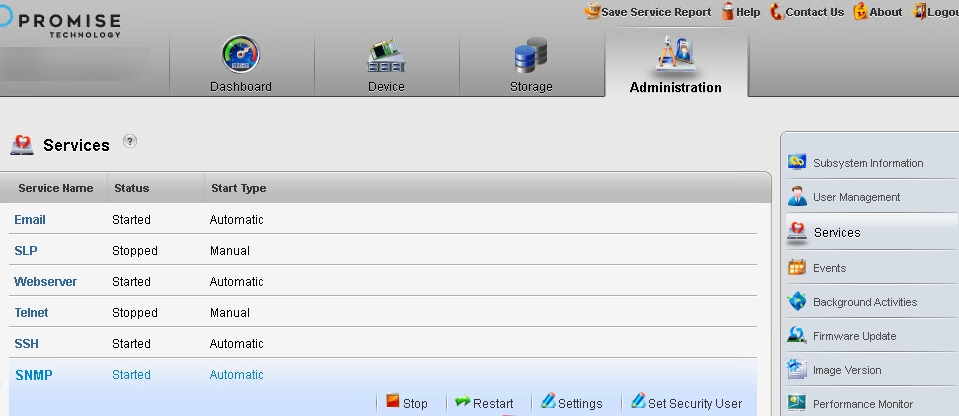
- Select the “Services” options from the right-side pannel:
- Select “SNMP” and then select “Settings”:

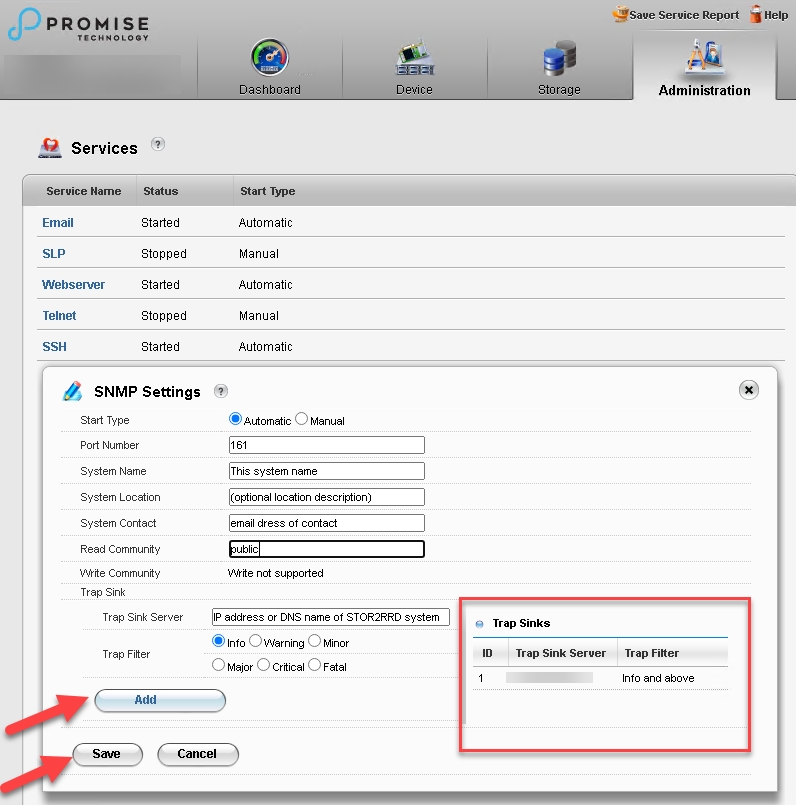
- Set the following:

- Then select “Add” and it will then be displayed in the Trap Sinks list on the right-side box outlined in red
STOR2RRD storage configuration
-
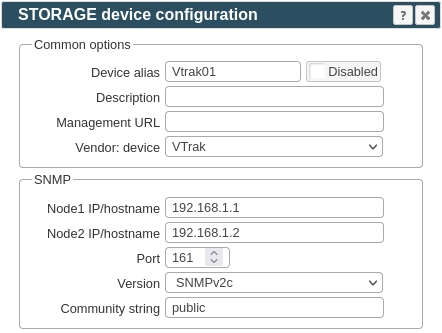
Add storage into configuration from the UI:
-
Assure you have enough of disk space on the filesystem where is STOR2RRD installed
Roughly you might count 2 - 30 GB per a storage (it depends on number of volumes, 30GB for 5000 volumes)$ df -g /home # AIX $ df -h /home # Linux
- Schedule to run storage agent from stor2rrd crontab (lpar2rrd on Virtual Appliance, it might already exist there)
Add if it does not exist as above
$ crontab -l | grep load_vtrakperf.sh
$
Assure there is already an entry with the UI creation running once an hour in crontab$ crontab -e # Promise Technology Vtrak 0,5,10,15,20,25,30,35,40,45,50,55 * * * * /home/stor2rrd/stor2rrd/load_vtrakperf.sh > /home/stor2rrd/stor2rrd/load_vtrakperf.out 2>&1
$ crontab -e

# STOR2RRD UI (just ONE entry of load.sh must be there)
5 * * * * /home/stor2rrd/stor2rrd/load.sh > /home/stor2rrd/stor2rrd/load.out 2>&1
-
Let run the storage agent for 15 - 20 minutes to get data, then:
$ cd /home/stor2rrd/stor2rrd
$ ./load.sh
- Go to the web UI: http://<your web server>/stor2rrd/
Use Ctrl-F5 to refresh the web browser cache.
Settings icon ➡ Storage ➡ New ➡ Vendor:device ➡ Promise Technology
 |